We share with you our itinerary, trip highlights and helpful information.
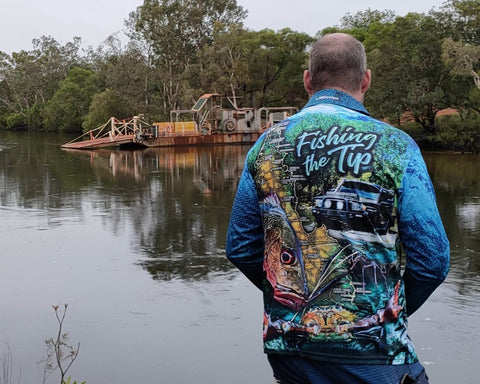
]]>Living in Cairns, the gateway to Cape York, we often make a mad dash to Cooktown or Lakefield for a long weekend of fishing.
But in June 2022, we hit the PDR and made our way right to the very top of Australia. What a beautiful spot this was for a family holiday.
Day 1 - Cairns to Archer River
After the last minute checks to ensure we had packed everything, and I mean everything we thought we could ever possibly need to survive for a whole year... We set off for our 10 day holiday. We had no definite plans for where we would stay that night, but we wanted to get as close to Moreton Telegraph Station as we could as we were to meet friends there the following day.
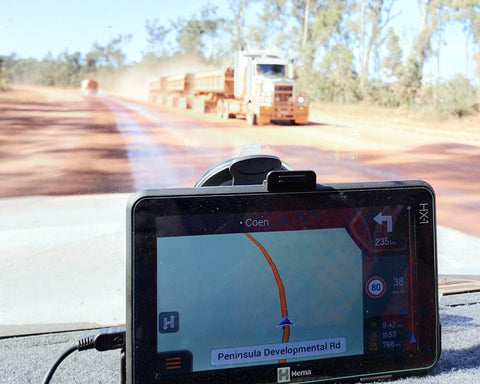
We passed by free camps near Coen, stretching along the side of the river that looked simply amazing, but after a long day of driving, the idea of a hot shower and dinner at Archer River won us over.
We rolled into Archer River Roadhouse just on dark and just in time to order dinner before the kitchen closed for the night.
Departure time: 9.50am
Arrival time: 6.13pm
Kilometres travelled: 554km
Fuel refill: Hann River Roadhouse
Notes: There were around 10 sections of dirt road averaging around 12km in length before you are back on the bitumen. The longest stretch of unsealed road was around 20kms and this section is full of dips so you need to take it easy.
Day 2 - Archer River to Moreton Telegraph Station
We packed up the camper and headed off on short drive to Moreton Telegraph Station. This was only our second day in and boy were we excited to see the lush green grass in the camping area.
Lachy quickly helped to set up the camper before disappearing down to the Wenlock to try and snag his first Barra of the trip.
We caught Barra and Black Bream and were told of Saratoga being caught a little further on downstream.
We all kept a lookout for Palm Cockatoos and Crocodiles, but didn't get to spot any during our stay.
Departure time: 9.00am
Arrival time: 10.50am
Kilometres travelled: 113km
Fuel refill: Archer River Roadhouse
Notes: There were around 3 sections of unsealed road with the longest being around 31km stretch with a deep crossing just before the Weipa turn off.
Day 3 - Moreton Telegraph Station to Bramwell Station
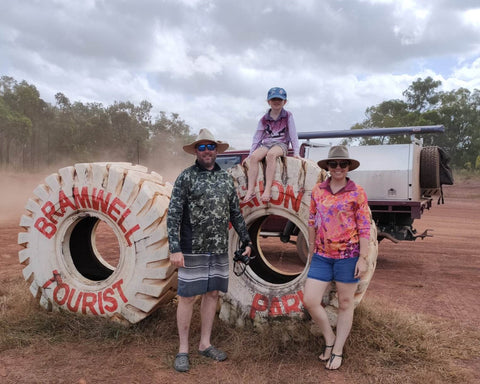
Just a quick trip down the road and we were at Bramwell Station. We dropped the campers off, then went on an explore down The Old Tele Track to Gunshot Creek.
Back to Bramwell later that afternoon for some live music.
Departure time: 9.23am
Arrival time: Sometime before lunch...
Kilometres travelled: 38km
Fuel refill: Bramwell Roadhouse in the afternoon after exploring OTT
Notes: We travelled 62km from Bramwell Station to the entry to the OTT heading towards Bertie Creek, Delhunty and Gunshot Creek and a further 13km into Gunshot Creek. This road was very narrow. Ideally if we had allowed a bit more time we could have explored more, before travelling 75km back to Bramwell Station.
Day 4 - Bramwell Station to Jardine River
We were booked to stay the night at Eliot Falls camp ground. However we began driving toward some rather stormy looking clouds which soon turned into heavy rain... We overheard UHF conversations about getting flooded in at Eliot Falls so we had a quick change of plan and continued on to the Jardine River camp area.
It was drizzling rain, everything was covered in mud, so we really only had 1 choice... go flicking lures along the Jardine in the hopes to catch a Barra...
Great amenities here and a beautiful river to sit back and relax for the afternoon.
Lucky for us the rain passed and we had perfect weather from here out.
Departure time: 9.50am
Arrival time: 1.08pm
Kilometres travelled: 166km
Notes: Rain was heavy, road got slippery, it was a bit of a slow trip.
Day 5 - Jardine River to Loyalty Beach (and The Tip)
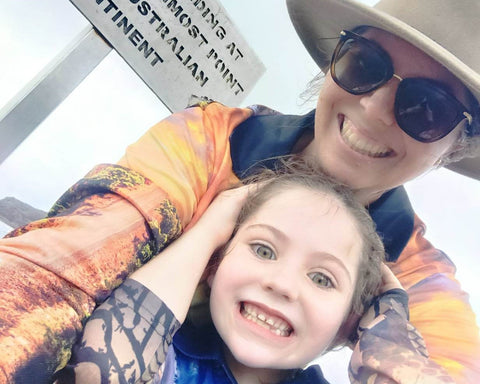
After purchasing our return ferry pass, we were on our way to Loyalty Beach. The campground here is just perfect! Picture this, sitting back with a beer, watching the sunset over the ocean while the kids play in the sand - yes, that kind of perfect!
But first, before we could get to the relaxing on the beach watching the sun go down, we had to get to The Tip! Afterall, we are almost there!
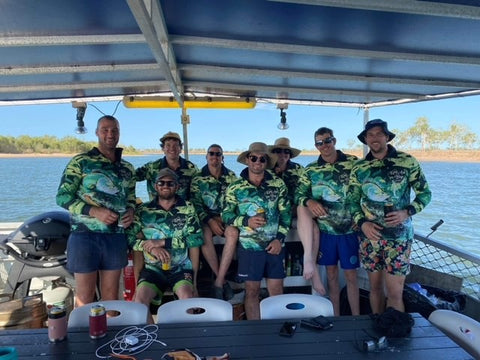
From the carpark, you have 2 options to get to the rocky headland - Over the hill, or around the beach. We took the moderate walk over the hill, scurrying over the rocks in great excitement when we saw.... A friendly crew of people in their Gunshot Croc Fishing Shirts. Talk about icing on the cake!
It is such an amazing experience standing at the most Northern point of Australia. Next time we will definitely bring some bikkies and cheese... and allow more time for fishing.
Departure time: 10am
Arrival time: Sometime before lunch...
Kilometres travelled: 49km
Notes: 37kms trip from Loyalty Beach Caravan Park to The Tip. We left the tip at 4.15pm and after a few quick stops at The Croc Tent and the bottle shop, we made it back to Loyalty at 5.30pm.
Day 6 - Exploring The Tip
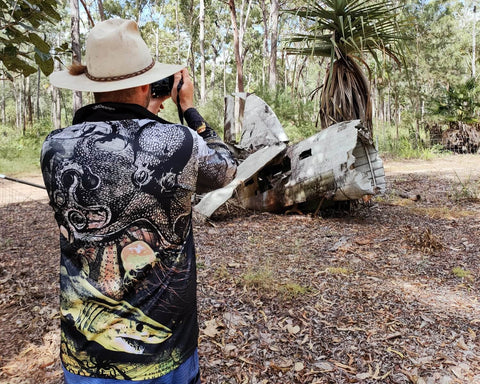
We spent the day exploring. We visited WWII aircraft wrecks, dropped into Cape York Ice & Tackle, had drinks and ice cream at Punsand Bay, did a spot of fishing at Seisia Wharf and finished off with dinner at Loyalty Beach Caravan Park.
Day 7 - Loyalty Beach to Sam Creek
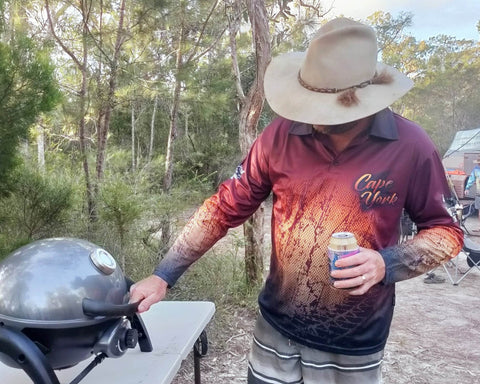
We travelled back across the Jardine Ferry and down the Tele Track to Sam Creek where we setup camp, cooked a roast dinner in the BBQ and took a dip at the crystal clear waterfall. This spot would have to be a huge highlight for everyone on the trip with us.
Departure time: 9.40am
Arrival time: 12.20pm
Kilometres travelled: 87km
Fuel refill: Seisia
Notes: No wait to get across the Jardine ferry at 10.35am.
If you can, allow a few days at each stop so you aren't packing up and setting up the whole time....
Day 8 - Exploring Waterfalls
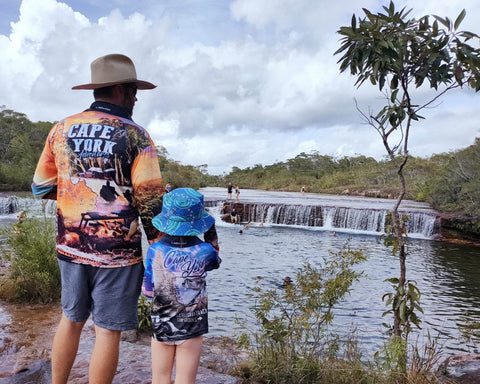
Everyone was super keen to hit the waterfalls today. We headed down the PDR to Fruitbat Falls, then onto Twin Falls & Eliot Falls. Fruitbat was great for swimming, but got a bit busy just as we were leaving with tour buses beginning to arrive.
Twin Falls was a favorite for the kids as there were shallow places and it was easy to get in and out of the water.
Eliot Falls was a bit too steep for the little ones to go swimming, but absolutely spectacular to see!
We decided to take the Tele Track back to Sam Creek and we are so glad we did! We had 2 vehicles and got through without a drama and saw so many beautiful spots along the way. We found it best to travel south to North up the OTT to avoid coming head on with too many other travellers.
We were all so disappointed our holiday was nearing the end, we could have relaxed at Sam Creek for a few more days.
Departure time: Some time in the morning
Arrival time - back to camp: 2.40pm
Kilometres travelled: 40km
Notes: Perfect 28 degree day. We spent an hour at Fruitbat Falls followed by 1-2 hours at Eliot/Twin Falls. Fruitbat was far busier due to tourist busses arriving so the earlier the better here.
Getting from Sam Creek to Fruitbat takes around 1 hour and 20 min down the PDR. Fruit Bat to Eliot took around 45min. Coming back to Sam Creek from Eliot took around an hour.
Day 9 - Sam Creek to Weipa

We said goodbye to our friends as we headed into Weipa for the night.
As we checked into the Weipa Caravan Park and saw these huge grassy camp sites, we soon decided one night wouldn't be enough. We extended our stay so that we could spend more time exploring Weipa, supporting the local shops, attending the Weipa Fishing Classic that was luckily on that weekend.
Departure time: 9.00am
Arrival time: Late afternoon
Kilometres travelled: 278km
Fuel refill: Bramwell Roadhouse
Notes: We used the payphone at Moreton Telegraph Station to book into Weipa Caravan Park.
Day 10 - Relaxing in Weipa

This little gem is well worth the visit. The Weipa Caravan Park is well maintained, there is a pool, cafe and kids playground and it is all within walking distance to the supermarket and bottle shop...
Day 11 - Weipa to Cairns
Sadly all good things must come to an end and it was time to head home. It was a huge day of travel from Weipa to Cairns. If we could have, we would have stayed the night at Hann River Roadhouse on the way home just to break up the drive. It was quite late by the time we pulled into home and we were totally exhausted!
Departure time: 9.10am
Arrival time: 9.30pm
Kilometres travelled: Aprox 760km
Fuel refill: Weipa, Hann River
Notes: There were around 17 sections of dirt road averaging around 10km in length before you are back on the bitumen. The longest stretch of unsealed road was around 20kms. The stretch between Coen and Musgrave were the worst of the roads during our trip. The road conditions worsened after a bit of rain and more traffic, but with road crews working up there constantly the roads are being upgraded and could be very different during your trip.
Great dinner at Palmer River Roadhouse at 6.00pm before rolling out on our final leg home.